 gin渲染
gin渲染
# 数据格式渲染
# JSON 数据渲染
package main

import (
	"github.com/gin-gonic/gin"
)

type Login struct{
	User string `form:"username" json:"username" xml:"username" uri:"username" binding:"required"`
	Password string `form:"password" json:"password" xml:"password" uri:"password" binding:"required"`
}

func main(){
	// 1、创建路由
	g := gin.Default()
	// 2、绑定路由规则
	g.GET("/json", func(context *gin.Context) {
		// (1)、自己拼接数据
		context.JSON(200,gin.H{
			"status": 200,
			"data": "joker",
		})
	})
	g.GET("/structJson", func(context *gin.Context) {
		var res struct{
			name string
			age int
		}
		res.name="joker"
		res.age=20
		context.JSON(200,res)
	})
	g.Run(":8000")
}
1
2
3
4
5
6
7
8
9
10
11
12
13
14
15
16
17
18
19
20
21
22
23
24
25
26
27
28
29
30
31
32
33
2
3
4
5
6
7
8
9
10
11
12
13
14
15
16
17
18
19
20
21
22
23
24
25
26
27
28
29
30
31
32
33
# XML 数据渲染
package main

import (
	"github.com/gin-gonic/gin"
)

type Login struct{
	User string `form:"username" json:"username" xml:"username" uri:"username" binding:"required"`
	Password string `form:"password" json:"password" xml:"password" uri:"password" binding:"required"`
}

func main(){
	// 1、创建路由
	g := gin.Default()
	// 2、绑定路由规则
	g.GET("/xml", func(context *gin.Context) {
		// (1)、自己拼接数据
		context.XML(200,gin.H{
			"status": 200,
			"data": "joker",
		})
	})
	g.GET("/structXML", func(context *gin.Context) {
		var res struct{
			name string
			age int
		}
		res.name="joker"
		res.age=20
		context.XML(200,res)
	})
	g.Run(":8000")
}
1
2
3
4
5
6
7
8
9
10
11
12
13
14
15
16
17
18
19
20
21
22
23
24
25
26
27
28
29
30
31
32
33
2
3
4
5
6
7
8
9
10
11
12
13
14
15
16
17
18
19
20
21
22
23
24
25
26
27
28
29
30
31
32
33
# YAML 数据渲染
package main

import (
	"github.com/gin-gonic/gin"
)

type Login struct{
	User string `form:"username" json:"username" xml:"username" uri:"username" binding:"required"`
	Password string `form:"password" json:"password" xml:"password" uri:"password" binding:"required"`
}

func main(){
	// 1、创建路由
	g := gin.Default()
	// 2、绑定路由规则
	g.GET("/yaml", func(context *gin.Context) {
		// (1)、自己拼接数据
		context.YAML(200,gin.H{
			"status": 200,
			"data": "joker",
		})
	})
	g.Run(":8000")
}
1
2
3
4
5
6
7
8
9
10
11
12
13
14
15
16
17
18
19
20
21
22
23
24
2
3
4
5
6
7
8
9
10
11
12
13
14
15
16
17
18
19
20
21
22
23
24
# protobuf 渲染
protobuf是谷歌开发的高性能读取写入方式。
package main

import (
	"github.com/gin-gonic/gin"
	"github.com/gin-gonic/gin/testdata/protoexample"
	"net/http"
)

type Login struct{
	User string `form:"username" json:"username" xml:"username" uri:"username" binding:"required"`
	Password string `form:"password" json:"password" xml:"password" uri:"password" binding:"required"`
}

func main(){
	// 1、创建路由
	g := gin.Default()
	// 2、绑定路由规则
	g.GET("/someProtoBuf", func(c *gin.Context) {
		reps := []int64{int64(1), int64(2)}
		label := "test"
		// protobuf 的具体定义写在 testdata/protoexample 文件中。
		data := &protoexample.Test{
			Label: &label,
			Reps:  reps,
		}
		// 请注意,数据在响应中变为二进制数据
		// 将输出被 protoexample.Test protobuf 序列化了的数据
		c.ProtoBuf(http.StatusOK, data)
	})
	g.Run(":8000")
}
1
2
3
4
5
6
7
8
9
10
11
12
13
14
15
16
17
18
19
20
21
22
23
24
25
26
27
28
29
30
31
2
3
4
5
6
7
8
9
10
11
12
13
14
15
16
17
18
19
20
21
22
23
24
25
26
27
28
29
30
31
# HTML 渲染
模板文件统一放到templates目录下,下面可以再根据不同的业务分不同的目录,比如student和teacher等。
如下:
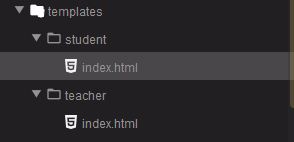
然后编辑 index.html
{{define "student/index.html"}}
<!DOCTYPE html>
<html lang="en">
  <head>
    <meta charset="UTF-8" />
    <meta name="viewport" content="width=device-width, initial-scale=1.0" />
    <meta http-equiv="X-UA-Compatible" content="ie=edge" />
    <title>{{.title}}</title>
  </head>
  <body>
    {{.msg}}
  </body>
</html>
{{end}}
1
2
3
4
5
6
7
8
9
10
11
12
13
14
2
3
4
5
6
7
8
9
10
11
12
13
14
在 Gin 中使用LoadHTMLGlob()或者LoadHTMLFiles()方法进行 HTML 模板渲染。
- LoadHTMLGlob:加载路径
- LoadHTMLFiles:加载文件
package main
import (
"github.com/gin-gonic/gin"
)
type Login struct{
User string `form:"username" json:"username" xml:"username" uri:"username" binding:"required"`
Password string `form:"password" json:"password" xml:"password" uri:"password" binding:"required"`
}
func main(){
// 1、创建路由
g := gin.Default()
// 2、加载HTML文件
g.LoadHTMLGlob("templates/**/*")
// 3、绑定路由规则
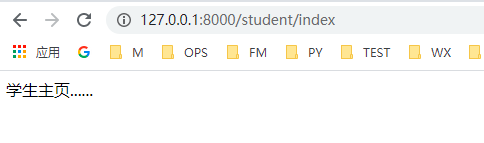
g.GET("/student/index", func(context *gin.Context) {
// 渲染html返回
context.HTML(200,"student/index.html",gin.H{
"title": "学生页面",
"msg": "学生主页......",
})
})
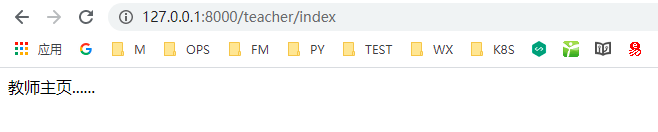
g.GET("/teacher/index", func(context *gin.Context) {
context.HTML(200,"teacher/index.html",gin.H{
"title":"教师页面",
"msg":"教师主页......",
})
})
g.Run(":8000")
}
1
2
3
4
5
6
7
8
9
10
11
12
13
14
15
16
17
18
19
20
21
22
23
24
25
26
27
28
29
30
31
32
33
2
3
4
5
6
7
8
9
10
11
12
13
14
15
16
17
18
19
20
21
22
23
24
25
26
27
28
29
30
31
32
33
# 自定义模板函数
定义一个不转义相应内容的safe模板函数如下:
func main() {
	router := gin.Default()
	router.SetFuncMap(template.FuncMap{
		"safe": func(str string) template.HTML{
			return template.HTML(str)
		},
	})
	router.LoadHTMLFiles("./index.tmpl")
	router.GET("/index", func(c *gin.Context) {
		c.HTML(http.StatusOK, "index.tmpl", "<a href='https://www.baidu.com'>百度</a>")
	})
	router.Run(":8080")
}
1
2
3
4
5
6
7
8
9
10
11
12
13
2
3
4
5
6
7
8
9
10
11
12
13
在index.tmpl中使用定义好的safe模板函数:
<!DOCTYPE html>
<html lang="zh-CN">
  <head>
    <title>修改模板引擎的标识符</title>
  </head>
  <body>
    <div>{{ . | safe }}</div>
  </body>
</html>
1
2
3
4
5
6
7
8
9
2
3
4
5
6
7
8
9
# 静态文件处理
当我们渲染的 HTML 文件中引用了静态文件时,我们只需要按照以下方式在渲染页面前调用gin.Static方法即可。
func main() {
	r := gin.Default()
	r.Static("/static", "./static")
	r.LoadHTMLGlob("templates/**/*")
   // ...
	r.Run(":8080")
}
1
2
3
4
5
6
7
2
3
4
5
6
7
# 多级目录
func main() {
	r := gin.Default()
	r.Static("/static", "./static")
  # 二级目录
	r.LoadHTMLGlob("templates/**/*")
  # 三级目录
  r.LoadHTMLGlob("templates/**/**/*")
   // ...
	r.Run(":8080")
}
1
2
3
4
5
6
7
8
9
10
2
3
4
5
6
7
8
9
10
渲染的时候需要:
c.HTML(http.StatusOK, "index/index.tmpl", nil)
1
并且在 index.tmpl 中还需要:
{{ define "index/index.templ" }}
<!DOCTYPE html>
<html lang="zh-CN">
  <head>
    <title>修改模板引擎的标识符</title>
  </head>
  <body>
    <div>{{ . | safe }}</div>
  </body>
</html>
{{ end }}
1
2
3
4
5
6
7
8
9
10
11
2
3
4
5
6
7
8
9
10
11
# 使用模板继承
Gin 框架默认都是使用单模板,如果需要使用block template功能,可以通过"github.com/gin-contrib/multitemplate"库实现,具体示例如下:
首先,假设我们项目目录下的 templates 文件夹下有以下模板文件,其中home.tmpl和index.tmpl继承了base.tmpl:
templates ├── includes │ ├── home.tmpl │ └── index.tmpl ├── layouts │ └──
base.tmpl └── scripts.tmpl
1
2
2
然后我们定义一个loadTemplates函数如下:
func loadTemplates(templatesDir string) multitemplate.Renderer {
	r := multitemplate.NewRenderer()
	layouts, err := filepath.Glob(templatesDir + "/layouts/*.tmpl")
	if err != nil {
		panic(err.Error())
	}
	includes, err := filepath.Glob(templatesDir + "/includes/*.tmpl")
	if err != nil {
		panic(err.Error())
	}
	// 为layouts/和includes/目录生成 templates map
	for _, include := range includes {
		layoutCopy := make([]string, len(layouts))
		copy(layoutCopy, layouts)
		files := append(layoutCopy, include)
		r.AddFromFiles(filepath.Base(include), files...)
	}
	return r
}
1
2
3
4
5
6
7
8
9
10
11
12
13
14
15
16
17
18
19
2
3
4
5
6
7
8
9
10
11
12
13
14
15
16
17
18
19
我们在main函数中
func indexFunc(c *gin.Context){
	c.HTML(http.StatusOK, "index.tmpl", nil)
}
func homeFunc(c *gin.Context){
	c.HTML(http.StatusOK, "home.tmpl", nil)
}
func main(){
	r := gin.Default()
	r.HTMLRender = loadTemplates("./templates")
	r.GET("/index", indexFunc)
	r.GET("/home", homeFunc)
	r.Run()
}
1
2
3
4
5
6
7
8
9
10
11
12
13
2
3
4
5
6
7
8
9
10
11
12
13
# 文件路径处理
关于模板文件和静态文件的路径,我们需要根据公司/项目的要求进行设置。可以使用下面的函数获取当前执行程序的路径。
func getCurrentPath() string {
	if ex, err := os.Executable(); err == nil {
		return filepath.Dir(ex)
	}
	return "./"
}
1
2
3
4
5
6
2
3
4
5
6
作者:
本文链接:https://jokerbai.com
版权声明:本博客所有文章除特别声明外,均采用 署名-非商业性-相同方式共享 4.0 国际 (CC-BY-NC-SA-4.0) 许可协议。转载请注明出处!
上次更新: 2025/07/19, 09:17:41
- 02
- 使用Zadig从0到1实现持续交付平台07-19
- 03
- 基于Jira的运维发布平台07-19
